Streaming video from a Raspberry Pi Cam using a distributed ROS system
In this post I’m streaming the video from a Raspberry Pi (model 3B) cam using ROS (Robot Operating System). We will have ROS configured as a distributed system: that is, it will be running in both PC (master) and Raspberry Pi (slave).
I’m working under ROS melodic, and I’m supposing that you have it already installed in your PC (installation instructions) and your Raspberry Pi (installation instructions)
And now you might be asking yourself:
But Olaya, what’s the point of having ROS running in the RPi? Couldn’t you just send the stream and have ROS running only on your PC?
Well, that’s a very good question, dear reader. Yes, I could just do that. The point is to be able to easily expand the system! Maybe in the future I want to have some ROS node running locally in the Raspberry pi to, let’s say, add a motor and make a gimbal. Or turn the Raspberry Pi into a robot somehow, without depending on the PC.
Here I will be explaining all the configuration process, starting by how to make the connection between Raspberry Pi and PC, followed by the camera setup, then the ROS setup, and finally running the image stream.
So, without further ado, let’s get into it!
Connecting to your Raspberry
There are two ways that you have of connecting to the Raspberry:
- SSH: by running
ssh pi@{raspberry_ip}in a terminal window, you will have access to the command line of the Raspberry pi, without desktop environment. - VNC: in this case, use any VNC Viewer (for example, I use VNC Viewer) to have the Raspberry desktop in your PC as a window. Similarly, you will have to write your Raspberry’s IP, and then the viewer will ask you for user and password.
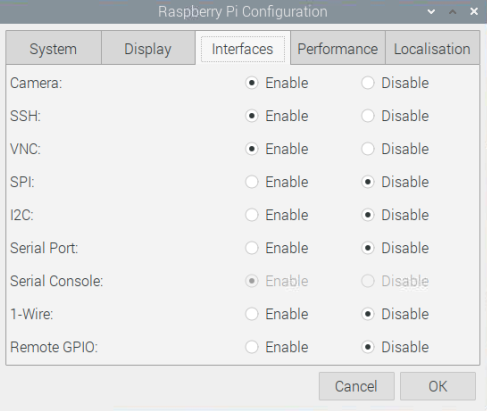
Be sure to have SSH and/or VNC enabled on Preferences > Raspberry Pi configuration > Interfaces.
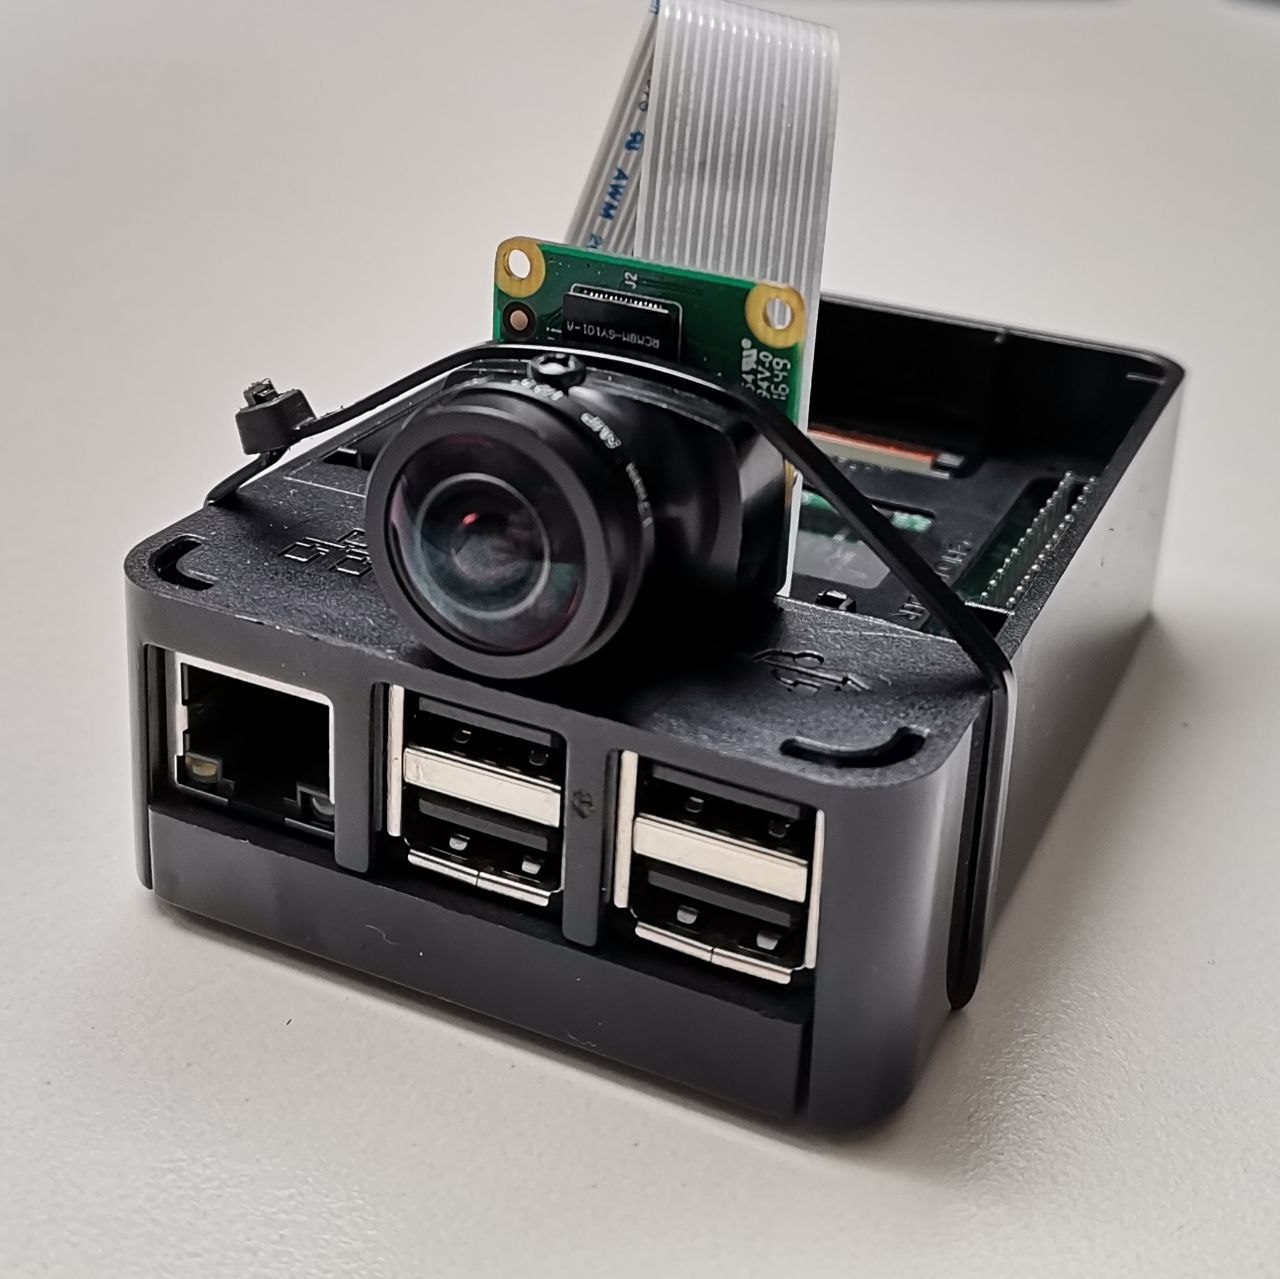
Configuring the camera
As I mentioned before, I’m assuming that you have a full install of ROS Melodic in your Raspberry. However, getting the ROS camera node to work on the Raspberry wasn’t straightforward for me, so here I’m showing you how I did it.
First of all, in Preferences > Raspberry Pi configuration > Interfaces, check that you have the camera enabled. If not, enable it and reboot your Raspberry Pi.
Now, we will install the required ROS packages to put the camera to work. I’m using the raspicam node by Ubiquity Robotics.
Open your Raspberry terminal and clone the repository into the src directory of your catkin workspace:
cd ~/catkin_ws/src
git clone https://github.com/UbiquityRobotics/raspicam_node.git
An additional step this package needs, is to install the dependencies not
recognized by ROS by creating the file /etc/ros/rosdep/sources.list.d/30-ubiquity.list:
sudo nano /etc/ros/rosdep/sources.list.d/30-ubiquity.list
Write the following into the file:
yaml https://raw.githubusercontent.com/UbiquityRobotics/rosdep/master/raspberry-pi.yaml
And run rosdep update. Install the dependencies with:
cd ~/catkin_ws
rosdep install --from-paths src --ignore-src --rosdistro=melodic -y
Now it might have given you an error like this:
ERROR: The following packages/stacks could not have their rosdep keys resolved to system dependencies: raspicam_node: No definition of [camera_info_manager] for OS version [buster]
That’s because there are some missing packages, but you can install them with the rosinstall tool:
rosinstall_generator compressed_image_transport --rosdistro melodic --deps --wet-only --tar > melodic-compressed_image_transport-wet.rosinstall

rosinstall_generator camera_info_manager --rosdistro melodic --deps --wet-only --tar > melodic-camera_info_manager-wet.rosinstall

rosinstall_generator dynamic_reconfigure --rosdistro melodic --deps --wet-only --tar > melodic-dynamic_reconfigure-wet.rosinstall
And now, from the catkin_ws folder:
wstool merge -t src melodic-compressed_image_transport-wet.rosinstall

wstool merge -t src melodic-camera_info_manager-wet.rosinstall

wstool merge -t src melodic-dynamic_reconfigure-wet.rosinstall

wstool update -t src
Fetch again that you have met all the dependencies:
rosdep install --from-paths src --ignore-src --rosdistro=melodic -y
Finally, build everything:
sudo ./src/catkin/bin/catkin_make_isolated --install -DCMAKE_BUILD_TYPE=Release --install-space /opt/ros/melodic -j1
This will take around 2 hours. Once it’s done, we’re ready to work with the camera!

Setting up ROS and the image stream
Checking the image stream
Let’s first check in the Raspberry pi that the camera node is working correctly. Simply launch it with:
roslaunch raspicam_node camerav2_1280x960.launch
And check in another terminal window that the camera topic is being published:
rostopic list
You should see a /raspicam_node/image/compressed
topic.
If you are using some VNC viewer, you can see the video stream by running rqt_gui and displaying the image topic:
rosrun rqt_gui rqt_gui
Setting up master and slave
First of all, both devices need to be on the same local network. The master device (the PC) is the one that will have the roscore running. Note that the roscore will run on the PC, working as master, and the camera on the Raspberry, the slave.
On the PC
Let’s start by configuring your PC to act as master.
Running ifconfig in your terminal, find the IP of your PC. That IP will be the
value of the ROS_IP parameter.
export ROS_IP="192.168.8.110"
And for the ROS_MASTER_URI:
export ROS_MASTER_URI="http://192.168.8.110:11311"
Alternatively, you can add them to the .bashrc and keep the values for future sessions:
echo'export ROS_IP="192.168.8.110"' >> ~/.bashrc
echo'export ROS_MASTER_URI="http://192.168.8.110:11311"' >> ~/.bashrc
On the Raspberry
open a terminal and ssh into your Raspberry pi.
Now, the ROS_IP of the RPi is the Raspberry’s IP, and the ROS_MASTER_URI is the
same PC IP that you specified before:
export ROS_IP="192.168.8.106"
export ROS_MASTER_URI="http://192.168.8.110:11311"
or write it to the .bashrc, just as before:
echo'export ROS_IP="192.168.8.106"' >> ~/.bashrc
echo'export ROS_MASTER_URI="http://192.168.8.110:11311"' >> ~/.bashrc
Now we’re ready to run the stream between the devices.
Running the image stream
With everything configured as we just did before, now running the stream is straightforward.
- Check that you have both devices connected to the same WiFi network
- Launch the raspicam node in the Raspberry:
roslaunch raspicam_node camerav2_1280x960.launch - Launch the roscore session in your PC:
roscore - Finally, you can see the stream in your PC by running the image viewer as:
rosrun image_view image_view image:=/image/compressed